

Avica Remote Desktop Softeware
* Secure Download
BlogHow to Share the Screen with Webex on Desktop and Phone?
How to Share the Screen with Webex on Desktop and Phone?
 Simon Brown • Feb 22, 2024
Simon BrownFeb 22, 2024
7min read
Today’s business ecosystem needs to be communicative and collaborative with external teams as they are with internal ones to gain success. If you are embracing hybrid work, then you want a collaborative tool such as Webex by Cisco, which is a platform to streamline teamwork. This unified application brings people together through calling, messaging, meeting, and content sharing.
Webex is a feature-rich solution that keeps teams of all sizes connected with its secure virtual workspaces. The Webex share screen feature adds this conferencing tool in fierce competition with Zoom and Google Meets. If you want to conduct a business meeting, go through this guide and learn to share the screen with Webex so you can be productive and engaging. In the meantime, we’ll also recommend a great alternative to the screen-sharing tool through this article
Part 1. Can We Share the Screen with Webex?
The short answer is affirmatory: 500+ Fortune organizations rely on Webex desktop sharing due to its advanced options. It lets users share documents and applications in the meeting to present their ideas while sharing their computer audio. In this regard, you can even share your Google Chrome, PowerPoint Slides, or Slack window and a document file of up to 50 pages in the free plan.
During the screen sharing, annotate the screen to demonstrate important points and turn your camera on to provide facial expressions in presentations. If you are using multi-screens, then Webex allows you to choose only one monitor to share with others.
Part 2. How to Share Screen on Webex on Android/iPhone?
Webex offers its availability to desktops, browsers, Android, and iPhone devices so everyone can join the collaborative session regardless of their devices. Moreover, screen sharing in Webex isn't limited to just the host; anyone from the meeting can take control and start sharing content. If you have joined the meeting from your mobile phone, move forward to explore how to share the screen in Webex:
Step 1: Install the Webex application on your phones through the App Store or Play Store. Then, launch it and access its main interface upon creating an account or logging in. Now, start a new meeting or join an existing one using the meeting ID or URL link. Once the host lets you in the meeting, hit the “Three Dots” icon from the bottom and get an extended list.

Step 2: Find the "Share Content or Camera" option from the appearing list and click on it. As you choose that option, you will navigate to another screen. If you want to share the entire screen, hit the “Share Screen” button from the next screen. Otherwise, you can proceed by selecting the “Photo” or “File” options.

Step 3: Finally, you will be prompted with a pop-up to confirm screen sharing. There, Android users should hit the “Start Now” button, and iPhone users can tap the “Start Broadcast” option to start screen sharing.

Part 3. How to Share Screen on Webex on Desktop or Web?
After learning screen sharing on a mobile phone, you must know how Webex screen sharing works. Now, it's time to learn how to share a screen on Webex using its desktop or online versions through a step-by-step guide. Therefore, you should go through this section to avoid any frustration during your business meetings or international conferences:
Step 1: Launch Webex after you download it from its website or access its web version. To enter a meeting, use the "Start a Personal Room meeting" or "Join a Meeting" button.

Step 2: Now, wait until the host lets you in the meeting or participants join. Then, navigate to the bottom and click the “Share” button before the “Record” button.

Step 3: After choosing “Share,” you will get another pop-up screen. There, tap on one category from the “Screen or Application,” “File,” and “Camera” options. Lastly, choose one screen to share and press the “Share” button to initiate the screen display.

Bonus Tips: Share Screen Anywhere Via Remote Access
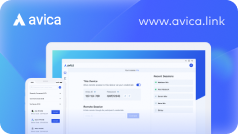
If you want a faster and more devoted platform for sharing screens, then shifting to the Avica Remote Desktop is the only option that remains. A primary reason for moving to this Webex share-screen alternative is the complex interface of Webex that hurdles individuals without any tech knowledge. Another thing you can count on is Avica's availability on Windows, macOS, Android, iOS devices and customization options.
In terms of customization, you can change the screen display and responsiveness from options like smooth, HD, Ultra HD, and customize. Besides, users can adjust the screen color mode, display, and frame rates, which are helpful for a personalized and high-quality viewing experience. Moreover, Avica is and-to-end encrypted with AES-256 encryption and features a patented protocol to offer faster speed.
Collaborative Features of Avica Remote Desktop
Anyhow, Avica is not just limited to those customization options explained above. If you want to uncover the basic features of Avica in comparison with Webex sharing, this part would be worth reading.
- File Transfer: Webex is a conferencing application that just connects people, but Avica offers complete control over remote devices. In this regard, users can transfer their documents and media to other devices in the remote session with a simple copy and paste or a file transfer feature.
- Privacy Mode: For your business communication, Avica has a privacy mode where you can perform critical tasks without making remote devices aware. This option can render your remote screen black, so no one can see your activities, and you can maintain confidentiality.
- Remote Shutdown/Restart: Unlike other communication platforms, Avica offers you remote access to other devices with greater control. Hence, if you are offering technical services remotely, you can shut down or restart the remote PC to troubleshoot issues effectively.
- Device List: Establishing remote connections with multiple devices is now easier with Avica through appropriate management. Users can now create lists and groups of their previously controlled devices so they can access them later conveniently without passwords.
Guide to Share a Screen Via Avica
Now that you are familiar with some advanced features of Avica to boost your individual or professional collaboration. Following that, let us show you an example that how to quickly share a Mac screen with a Windows PC via Avica.
Feel free to download Avica software by clicking the button below. If you're seeking additional information about Avica product downloads, you can visit the Avica download page. Rest assured, Avica guarantees the safety and virus-free nature of all products obtained from the official website or app store.
Step 1: Enable the Avica ID and Password from the Mac
Access the main interface of Avica for Mac after launching its newer version and signing into your account. There, toggle the "Allow Remote Access to this Device via Your Credentials" from your macOS. Once you activate that button, "Avica ID" and "Password" will appear. Now, copy those credentials and head over to your local Windows computer.

Step 2: Insert Credentials in Your PC and Connect to Start Sharing
Upon reaching Avica on your Windows computer, place your cursor in the text box under “Remote Session.” Next, start typing the earlier copied “Avica ID” and hit the “Connect” button. Then, insert the “Password” of macOS Avica and again use the “Connect” button to get the display of the Mac screen.

Frequently Asked Questions (FAQs)
Webex is growing its capabilities to provide users with a more collaborative experience, and this guide has also explained its operations by all means. Nevertheless, consider reviewing the FAQs below if you are having trouble sharing Webex screens.
1. Why is Webex screen sharing not working?
Sometimes, users find issues sharing their screens or documents for several reasons. The first reason could be insufficient permissions users allow while using Webex, especially on their macOS. Besides, it will not be shared if you try to share a document with more than 200 pages and 100 MB.
Apart from that, your screen-sharing feature will not work if the host hasn’t given you permission or some administrative privileges.
2. Can you share the screen on Webex if you are not the host?
Yes, you can share the screen if you are not a host, cohost, or presenter, but for this purpose, you need to grant permission from the host. However, instruct the host of the meeting to click the “Three Dots” icon from their Webex desktop meeting interface.
Then, choose the "Meeting Options" from the list and enable the "Share Content" option to confirm with the "Apply" button. Now, the meeting participant can share their screens by entering a Presenter role.
3. How do I control the shared screens in Webex?
Through Webex, you can only share the screens with the meeting participants and cannot control others' screens. If you want to control the shared screen, use the Avica remote desktop, as it provides greater control over the remote screens. You can even transfer your files from the local computer to the remote device within the session, regardless of your physical location and devices.
Conclusion
Altogether, Webex is a webinar solution that offers real-time collaboration to facilitate remote work. Its screen-sharing ability also assists professionals in demonstrating what they are trying to convey. This article sheds light on Webex’s how-to share screen to operate it on iPhone, Android, Windows, and Mac devices.
All things considered, it was a complex platform for beginners that showed lagging while sharing screens. Thus, moving to Avica proves a good decision due to its low latency, high-end security, and control over remote devices.
On this page
You May Also Like


