

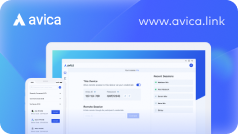
Avica Remote Desktop Softeware
* Secure Download
BlogHow to Share the Screen on Teams with Others?
How to Share the Screen on Teams with Others?
 Simon Brown • Feb 16, 2024
Simon BrownFeb 16, 2024
7min read
Microsoft Teams is a workspace or team collaboration application that was developed by the Microsoft 365 family product and initially released in 2017. It’s a messaging app for organizations and offers team collaboration, meetings, and file-sharing while being accessible to all. This video conferencing app grew from millions to hundreds of millions of active users during the COVID-19 pandemic and started updating.
The Teams screen share feature is among its innovations and strategic decision to compete with Zoom and other communication spaces. It's a powerful feature that aims to conduct virtual presentations, share important notes, and distribute critical audio with colleagues. Anyhow, let's get in-depth insights on this feature and learn how to share the screen on Teams conveniently. In the meantime, we’ll also recommend a great alternative to the screen-sharing tool through this article.
Part 1. Can I Share Screen on Microsoft Teams for Free?
The short and simple answer is affirmative: anyone with a Microsoft account can share their screen with other meeting participants for free. For this purpose, Microsoft lets Windows and macOS users share their complete desktop screen, certain Windows, PowerPoint, or whiteboard. Consequently, they securely collaborate with trusted meeting members while maintaining control over data.
Before moving towards how to share the screen in Teams, the meeting administrator needs to configure certain options from the Teams admin center. In this regard, they should permit participants to distribute notes, share PowerPoint, collaborate on whiteboards, and request admin control.
Part 2. How to Share Screen on Teams on PC and Mac?
Microsoft Teams has been making significant upgrades since the rise of Zoom, making it competitive with Slack and Zoom. It facilitates background blurring, room support, annotating, and limitless options to lead over other video providers. For now, you can follow the below steps and review how to share the screen on Microsoft Teams:
Step 1: Launch Microsoft Teams on your macOS or Windows PC and sign in to your account. Afterward, start an instant meeting or enter into an existing meeting started by others. Upon reaching the Teams online meeting, access the “Share” icon from the top-right side and click on it.

Step 2: Once you choose the “Share” icon, you will get a pop-up screen named “Share Content.” If you are using Teams on the web browser, hit the only available option of “Screen, Windows, or Tab.” Then, tap one screen of your choice and press the “Share” button to start the screen sharing.

Step 3: If you are using the application, click the “Share” icon and proceed with the “Share Content” pop-up screen. There, select one screen or window, and the sharing process will automatically be initiated without further confirmation.

Part 3. How to Share Screen in Teams on Mobile?
Imagine you are away from your office desk or other digital appliances and suddenly encounter a critical business meeting. In that situation, Microsoft Teams would allow you to join and collaborate with others over their smartphones, either iPhone or Android. If this seems interesting to you, head down and get the stepwise method of using the Microsoft Teams share screen feature:
Step 1: Download Microsoft Teams on your smartphone through the App Store or Play Store. Then, sign into your account and join a meeting via your suitable method. Now, touch the “Three Dots” icon from the bottom of the screen and get a pop-up menu appearing from the bottom.

Step 2: From the next screen, press the “Share” button. Afterward, a permission request will be sent to the host to let the meeting participants share the screen.

Step 3: After getting permission, select the “Share Screen” option that appears next, and the screen will start displaying to others. You can also enable the “Audio” next to “Share Screen” or continue sharing without it.

Bonus Tips: Fast Way to Share Screen on Any Device With Others
As highlighted above, Teams screen sharing lets Microsoft users chat, call, and collaborate quickly without any technical complications. Nevertheless, it’s not a preferable choice for business professionals who need to analyze multiple screens and uplift their productivity in remote work. For their ease, Avica Remote Desktop software comes forward with its intuitive interface and inclusive tools for remote businesses.
This platform is designed to fasten the remote work while ensuring security through end-to-end AES-256 encryption. Surprisingly, users can not only access remote screens but also control the host devices as if they are operating by being physically present there. Moreover, Avica allows its users to customize their remote set-up by adjusting the screen resolution, FPS, color, and display from multiple options.
Remarkable Features of Avica Remote Desktop Software
If we continue the discussion of customizing the remote set-up, Avica even lets you personalize the screen display and responsiveness from smooth, HD, and Ultra HD options. To know more about this exclusive platform, you need to go through its key features, which are explained in this section:
- File Transfer: When people share the screen on Teams, they can just display the screen to others, while Avica enables them to transfer documents and media. It can copy-paste, drag-drop, and transfer files in remote sessions to save time and retain the security of confidential data being shared with trusted devices.
- Multi-Monitor: If compared with Microsoft Teams, you can access multiple screens on your monitor by using Avica. It provides multiple virtual screens to view and work while getting additional displays.
- Screen Recording: It is another rare feature that Avica offers built-in to save the remote access activities for later use. You can stop the recording anytime with a pause button and proceed with a single click to record complete tutorials from remote sessions.
- Unattended Access: This feature serves as a productivity booster because you don’t need credentials to access a remote device for a second time. Users can create groups and manage unlimited devices to initiate remote connection anytime, even when no one is around the remote device.
How to Share Your Screen Through Avica Remote Desktop
Similar to Microsoft Teams screen sharing, Avica also supports voice sync and text chat options to discuss integral meeting points on one platform. If we focus back on just screen sharing, below is an example of a guide to demonstrate how screen sharing from PC to PC via Avica.
Feel free to download Avica software by clicking the button below. If you're seeking additional information about Avica product downloads, you can visit the Avica download page. Rest assured, Avica guarantees the safety and virus-free nature of all products obtained from the official website or app store.
Step 1: Navigate to Set Up Avica and Get Credentials for Remote Sessions
Download Avica’s newer version on your PC devices. Following this, launch it and use your e-mail credentials to sign in to Avica. Afterward, turn on the "Allow Access to this Device via Your Credentials" option from the remote PC device. Now, "Avica ID" and "Password" will appear, which you should copy and return to your local PC device.

Step 2: Utilize the Remote Device Credentials to Establish Connection
As you reach the local PC, locate your cursor in the text box of the “Remote Session” section. There, enter the Avica ID obtained from the remote device and hit the “Connect” button. Upon pressing the “Connect” button, you will get another pop-up screen requiring a password. Next, insert the earlier copied “Password” and use the “Connect” button to witness the establish a screen-sharing session.

Frequently Asked Questions (FAQs)
By exploring this article, you must have discovered many advanced communication possibilities with or without screen sharing Microsoft Teams. If you are facing some troubles in that process or have a query, read these FAQs to find out the answers to your concerns.
1. Why can't I share the screen in Teams?
While starting screen sharing in Microsoft Teams, you might experience a black screen or error messages. The reason could be your weak internet connection, many cache files, and the higher display resolution of Windows. Possibly, the meeting host might restrict participants from sharing, or you need to update the Microsoft Teams, hurdling screen sharing.
2. Can you share the screen on the Microsoft Teams Web version?
Yes, Teams users can share their screen without installing it, but for proper functioning, you need to run it on Chrome and Microsoft Edge browsers. If you are a frequent user of another browser, you should step towards using Avica’s web version, which is compatible with all kinds of web browsers. Besides, it is available to install on Android, macOS, iPhone, and Windows PC.
3. How do I share a presentation in Microsoft Teams?
If you have to present a PowerPoint presentation, a standard format to display slides is to use the share screen in Teams. While further specifying the process, let us remind you that you need to choose the "Three Dots" icon and proceed with the “Share” icon.
Meanwhile, open your presentation in the background and choose that presentation from the “Presentation Live” section of the “Share Content” pop-up. Henceforth, your presentation will be shared with the meeting participants, and you can continue presenting.
Conclusion
In the end, Microsoft Teams finds itself struggling against video conferencing platforms by offering screen-sharing abilities with audio and annotations for collaboration. That’s why this article highlights its operations through stepwise guides on how to share the screen on Teams from a PC or smartphone.
Eventually, with evidence, the Avica remote desktop was found to be more appealing to users looking for modern communication and greater control. Therefore, it suggested trying this platform to experience incredible speed, security, and compatibility regarding screen sharing and controlling remote devices.
On this page
You May Also Like


