

Avica Remote Desktop Softeware
* Secure Download
BlogHow to Share a Screen in Messenger on Your Desktop or Phone?
How to Share a Screen in Messenger on Your Desktop or Phone?
 Simon Brown • Feb 21, 2024
Simon BrownFeb 21, 2024
5min read
Messenger is widely known as Facebook Messenger and was developed by Meta Technologies in 2008. Initially, it was integrated into the Facebook website to communicate via instant messages, images, and videos. With continued advancement, it emerged as a separate application and started improving user experiences by making their conversation smoother and faster.
Besides sending media and messages, Messenger lets you make video and voice calls with friends to quickly share gossip. To facilitate modern communication, Facebook is expanding its features and revealing Messenger screen share options for easy collaboration. This article will shed light on this feature and comprehensively show you how to share the screen in Messenger from any platform. In the meantime, we’ll also recommend a great alternative to the screen-sharing tool.
Part 1. Can You Share the Screen on Facebook Messenger?
For sure, anyone with a Facebook account can share their screen with other people added to their friend list. The Facebook Messenger screen share feature can only be enabled when you hold a video or audio call with your friends on Facebook. To benefit from this platform, you should install its latest version or update the existing one.
It lets you stay in touch with your loved ones by showing them what’s happening on your phone and what you are trying to describe verbally. Messenger is certainly the one you can feel confident using if you want to keep communication on one platform due to security concerns.
Part 2. How to Share Screen in Messenger on Android/iPhone?
Messenger helps you connect with the people you care about and show your moments with them through the screen share Messenger feature. Primarily, social media users tend to use Facebook and Messenger applications on their smartphones for quick communication. That’s why this part will show you how to use the screen-sharing feature of Messenger on iPhone and Android through the given steps:
Step 1: Launch Messenger on your smartphone, log in to your Facebook account, or create a new one. Afterward, open chat with your friends on Facebook and hit the "Video" or "Audio" call icons. After starting a call, navigate to the “Media” icon at the bottom of the screen.

Step 2: Following this, tap the “Screen Sharing” button from the bottom. Upon selecting that button, you will get a pop-up window to press the "Start Sharing" button again.

Step 3: If you are an iPhone user, you will find a pop-up for confirmation. There, hit the "Start Broadcast" option, and screen sharing will begin as the countdown finishes. Otherwise, the Android phone will ask permission for sharing through the "Start Now" option.

Part 3. How to Share Screen on Messenger on a Desktop?
Sometimes, tutors share screens on Messenger and demonstrate concepts because of the students' convenience and familiarity with this platform. In this regard, they need to show presentation slides and other documents while using their desktops. For their ease of operation, this step-by-step guide will explain how to screen share on Facebook Messenger and stay focused on teaching:
Step 1: Install Messenger on your Windows PC or MacBook using a web browser and log in to your Facebook account. If you don't have one, create an account and add friends with whom you want to share the screen. Then, open chat with your friend and start a call through the "Voice" or "Video" icons at the top. After initiating a call, go directly to the bottom bar and click the "Screen Share" button.

Step 2: Now, you will find a pop-up screen to pick one display to share from “Your Entire Screen” or “Application Window.” Finally, tap on one screen and hit the “Share” button to make your screen visible to everyone.

Bonus Tips: Make Screen Sharing Easier via Remote Access
Although the screen share with Facebook Messenger is relatively easy and accessible, it doesn't support advanced features for professional collaboration. For unconventional processing, you should shift to a dynamic option, which is Avica remote desktop software, a leading screen-sharing tool.
This software is compatible with Windows, macOS, Android, iOS devices and is also available on web browsers to use without installation. In terms of innovation, it allows you to adjust the picture quality by changing frame rates from multiple options. Besides, it works fast because of the integrated featured patented protocol, which facilitates speed and low latency.
Explore Key Features of Avica to Upgrade Your Communication
Not only that, but you can also personalize the screen display from the available options. If you want to know more, continue exploring and delve into its noteworthy features that are briefly discussed:
- Gamepad: By now, you must know that this is a devoted platform for screen sharing, but did you know it facilitates gamers to play fearlessly? Yes, Avica offers a Gamepad feature to use up to 4 controllers without any lagging and maintain their win-win streak in remote gaming sessions.
- Screen Recording: Apart from the share screen Messenger, you can record the remote session using an internal feature of Avica. Users prefer to capture the recording sessions while explaining technical concepts, and Avica helps them by recording professional, high-quality shots.
- Device Management: This application is not just limited to screen sharing; instead, it aims to provide you with complete ease and maximum collaboration. Thus, you can create groups of controlled devices to access them later without credentials.
- File Transfer: Have you ever heard of any video conferencing app offering file transfer during screen sharing? Definitely, no, because this ability is new, and Avica can transfer files through a devoted file transfer button that safely moves your important data in remote connections.
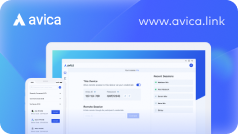
Guide to Share Your Screen via Avica
Avica comes up with a user-friendly design and intuitive interface to simplify remote access from any corner of the globe over an internet connection. Hence, let’s show the simplest example of operating this exclusive alternative of Messenger screen share by establishing a session between two PCs.
Feel free to download Avica software by clicking the button below. If you're seeking additional information about Avica product downloads, you can visit the Avica download page. Rest assured, Avica guarantees the safety and virus-free nature of all products obtained from the official website or app store.
Step 1: Access the Main Interface of Avica and Generate Credentials
As you have installed and launched Avica to begin the process, sign in and access its main interface. Following that, activate the "Allow Remote Access to this Device via Your Credentials" on your remote PC. Then, note the further credentials and go to Avica's home screen on your local PC.

Step 2: Add the Obtained Credentials and Start Sharing PC screen
After getting into the local device’s Avica, access the "Remote Session" section. There, enter the earlier obtained "Avica ID" and move forward with the "Connect" button. Upon using that button, enter into the next pop-up and write the "Password" of the remote device. Finally, you get the screen of a remote device, which you can control through your local monitor.

Frequently Asked Questions (FAQs)
Before concluding the discussion, here are some commonly asked queries with their simple and working solutions. If you are stuck in a situation requiring you to share your screen or Messenger, find some resolutions to avoid any inconvenience.
1. Why is screen sharing not working on Messenger?
If you are unable to share the screen on Messenger, you might be using an outdated application or an incompatible browser. Besides, there is a possibility that your operating system has not allowed the necessary permissions to access the camera and microphone for the process. Moreover, the Messenger server might be in a maintenance process that could terminate the screen sharing temporarily.
2. What is the screen sharing limit on Facebook Messenger?
Meta-designed Messenger Rooms to share screens with a maximum of 50 people for group collaboration. Only the host can allow the participants to share their screens with the group in that room. If you want to access screens from multiple participants concurrently, you need to shift to Avica’s group monitoring feature because Messenger doesn't support this ability.
Conclusion
Now that you are familiar with the screen-sharing ability of Facebook Messenger, communication on a single platform must get easier for you. This article has guided you through detailed steps on how to share screens on Messenger from iPhone, Android, or any desktop.
Moreover, you have found an exceptional alternative: Avica remote desktop software that can even control remote devices. Anyhow, if you need a devoted screen-sharing tool to promote your remote business, explore Avica and get an innovative communication experience.
On this page
You May Also Like


